Why this article exists
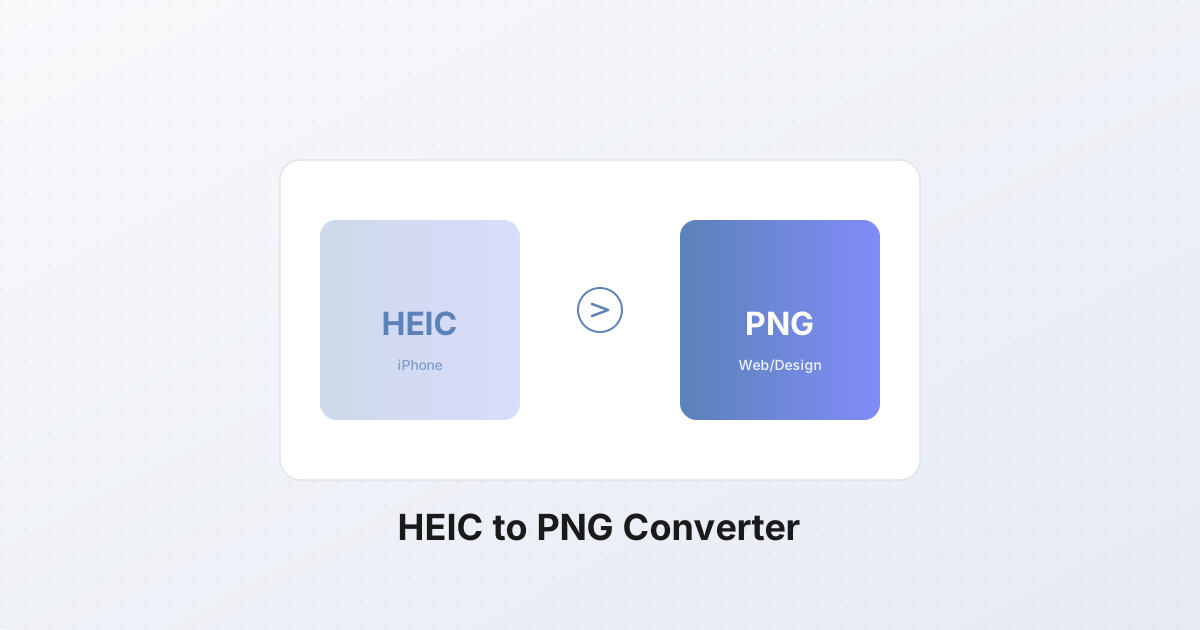
If you take a photo on an iPhone and drag it into Figma, Sketch, or Adobe XD, sometimes it works and sometimes it shows a broken file icon. The reason is almost always HEIC. Apple's default photo format since iOS 11 (2017) saves storage on your phone but creates friction everywhere outside the Apple ecosystem. The standard fix is to convert HEIC to JPG, which works fine for sharing and web upload. But JPG is the wrong format if you're going to edit, re-export, or use the image as a design asset — and that's where PNG comes in.
This article is about when HEIC to PNG is the right call, what actually happens to your pixels during conversion, and how to do it without shipping your photos to a server.
A quick recap of HEIC
HEIC stands for High Efficiency Image Container. It's a container format Apple adopted in iOS 11 (2017) to wrap images compressed with HEVC (H.265) — the same codec family that powers 4K video. The headline number: a HEIC photo is roughly 50% smaller than a JPEG of equivalent visual quality. A 5 MB iPhone JPEG becomes a 2.5 MB HEIC, and you can't see the difference at normal viewing distances.
Apple chose HEIC for a simple reason: phone storage is finite and expensive, and the iPhone camera pipeline started producing very large files once it hit 12 megapixels and added computational photography features. Halving photo sizes doubles how many photos fit on a 128 GB phone, halves iCloud backup costs, and halves the bandwidth of every photo you share over AirDrop. From Apple's side it was a no-brainer.
The cost lands on everyone else. HEIC decoding is not universal. It's first-class on iOS 11+, macOS High Sierra+, and modern Android (9+); tolerated on Windows 10/11 with the right codec; and only recently first-class in Chrome (108+) and Safari (17+). Firefox still has no native HEIC support as of 2026. Design tools have been even slower — Figma added HEIC import in 2023, Sketch's support is partial, and Adobe XD historically required a plugin.
PNG vs JPG: why PNG wins for design work
If you've already decided to convert HEIC away, the next question is to what. JPG is the obvious default, but for design work it's usually the wrong choice. Here's why PNG is the better target when the image is going into a design workflow.
PNG is lossless
A PNG file is a bit-for-bit copy of the source pixels. Save it, re-open it, save it again — the pixels do not change. This matters in design because assets get re-saved constantly: you import a photo, mask it, adjust hue, export a version for review, re-export with a tweak, export final. Every JPG re-save compounds compression artifacts (this is called generation loss); each save throws away a little more detail and adds a little more blockiness in flat areas like sky and skin. PNG stops that cycle cold.
For a photograph coming out of an iPhone, the HEIC original has already applied lossy compression. Converting HEIC to JPG applies a second lossy step. Converting HEIC to PNG applies none — the PNG is a perfect copy of whatever the HEIC decoder produced. From that point on, you can edit and re-export the PNG as many times as you want without further degradation.
PNG supports transparency
JPG cannot store an alpha channel. Every pixel in a JPG must be a solid color. If you remove the background from an iPhone portrait in Photoshop or Figma and export as JPG, the transparent area becomes black, white, or whatever fill color the exporter picks — you've lost the cutout. PNG stores up to 256 levels of transparency per pixel (8-bit alpha), so a cutout exported as PNG can be placed on any background, in any layout, without re-cutting.
For design work this is non-negotiable. Product photos with transparent backgrounds, UI element cutouts, icon variants — they all need alpha, which means they all need PNG (or WebP, but PNG has the broader tool support).
PNG is universal in design tools
Every design tool you're likely to use opens PNG without negotiation:
- Figma — native import, preserves alpha, no plugins required
- Sketch — native import, alpha preserved
- Adobe XD — native import
- Affinity Designer / Photo — native, full ICC support
- Photoshop — native, full ICC and 16-bit support
- Illustrator — placed PNGs behave predictably
JPG also works in all of the above, but HEIC support is patchy (especially in older versions and in Sketch). If your goal is "this asset just works everywhere I paste it," PNG is the safest target.
PNG is the lingua franca of web UI assets
Logos, icons, button states, illustrations, decorative cutouts — when a web designer hands a developer an asset, PNG is still the default. SVG wins for vector, but for any raster element with transparency, PNG is what ships. Converting your HEIC source straight to PNG puts the file in the format you're going to need anyway.
When to convert HEIC to PNG vs HEIC to JPG
The decision is mechanical once you know the rule:
- PNG — design work, editing, anything you'll re-save multiple times, anything that needs transparency, anything destined for a UI asset library.
- JPG — web photos, email attachments, social media posts, final delivery to a client who just wants to view the image.
A useful heuristic: if you're going to open this image in a design tool, convert to PNG. If you're going to upload it to a website or send it in a message, convert to JPG.
The corollary: if you're not sure, and the image is a photograph with no transparency, you can convert to PNG now and to JPG later when you publish. Going HEIC → PNG → JPG is lossless at the first step; going HEIC → JPG → PNG just produces a large PNG that still has JPG artifacts baked in.
The size reality: 5x larger, and why that's OK
Here's the part that surprises people the first time. A typical iPhone HEIC photo is around 1.5–2.5 MB. Convert that same photo to PNG and you'll get an 8–15 MB file. That's roughly 5× larger.
This isn't a bug. PNG is lossless, and a 12-megapixel photograph has a lot of high-frequency detail (sensor noise, fabric texture, foliage) that lossless compression cannot pack efficiently. PNG's DEFLATE algorithm is excellent for graphics with flat regions — logos, screenshots, UI — and bad for noisy photographs. HEIC's HEVC codec, by contrast, was designed exactly for this kind of content.
If this sounds like a deal-breaker, it isn't — for design work. The reason: you don't ship the PNG. The PNG is your working file. You edit it, composite it, mask it, color-correct it, and then at the very end you export the final delivery version in whatever format the destination needs — usually JPG or WebP for a photo, optimized PNG or SVG for an asset. The 8 MB PNG lives in your project folder and never leaves your machine.
The only situation where the size jump is genuinely a problem is if you're converting 5,000 vacation photos to PNG "just to be safe." Don't do that. Use JPG for bulk photo conversion; reserve PNG for the photos you're actually going to edit.
The Live Photo and burst problem
HEIC can store more than one image per file. This is one of its real advantages over JPEG and PNG, and it's also a trap when converting.
An iPhone Live Photo is a single .heic file containing a still image plus roughly 1.5 seconds of video (technically a short HEVC-encoded movie) recorded before and after the shutter. A burst is a single .heic file containing a sequence of still images — you held the shutter button, the phone shot 10–30 frames, and they all live in one HEIC container.
PNG, by contrast, is single-frame. One PNG = one image. No motion, no sequence.
When you convert a Live Photo HEIC to PNG, the converter has to make a choice:
- The cover frame only. Most converters (including browser-based ones using libheif) extract the primary still image and discard the motion portion. You get a clean PNG of the moment you "took" the photo, but the Live Photo effect is gone.
- Each frame as a separate file. Some tools can split a Live Photo into a series of PNGs (or a PNG plus a short video), but this is rare in browser-based converters.
For bursts, the same applies: a 20-frame burst HEIC either becomes one PNG (the cover frame) or 20 PNGs. The former is the default; the latter requires a tool that explicitly supports HEIC item iteration.
Practical implication: if you have Live Photos or bursts that you care about as motion sequences, keep the original HEIC files. Convert only the still frames you actually need as PNG for design work.
Color profile preservation: Display P3 and ICC
iPhone photos since the iPhone 7 are shot in Display P3 — Apple's wide-gamut color space that covers roughly the same range as DCI-P3 cinema. Display P3 can represent about 35% more colors than sRGB, particularly in the reds and greens. Skies, sunsets, foliage, and skin tones all benefit.
When you convert HEIC to JPG, color profile handling is fragile. Many JPG encoders silently strip the ICC profile and assume sRGB, which means your Display P3 photo gets compressed into the smaller sRGB gamut — reds become orange, deep greens become muted, and the saturation you saw on your iPhone is gone. The file looks "fine" but it's not what you shot.
PNG handles this correctly. The PNG spec includes an iCCP chunk for embedded ICC profiles and a gAMA chunk for gamma. A well-behaved converter will take the Display P3 ICC profile from the HEIC file and embed it directly in the PNG output. When you then open that PNG in Photoshop, Affinity, or Figma, the design tool reads the ICC profile and renders the image in the correct color space.
Practical advice: use a converter that explicitly preserves ICC profiles. Browser-based converters using libheif plus native canvas encoding usually do this correctly, but it's worth checking the first converted file with exiftool to confirm:
bashexiftool -icc_profile:all output.png
If that prints "Display P3" or similar, you're good. If it prints nothing or "sRGB," your converter is dropping color information.
How browser-based HEIC conversion actually works
The SynoxTools converter and similar browser-based tools don't upload your photos. The conversion happens entirely on your device, in your browser, using WebAssembly.
The pipeline:
- File read. You drop a .heic file. The browser reads it as an
ArrayBuffer— raw bytes, no upload. - WASM decode. A WebAssembly build of libheif (the open-source HEIC/HEIF reference library) parses the HEIC container and decodes the HEVC-compressed image data into raw RGBA pixels. This is the same library that powers parts of macOS's native HEIC support.
- Pixel handoff. The decoded pixels are passed to a Canvas element as an
ImageDataobject. - ICC profile transfer. The Display P3 ICC profile extracted by libheif is attached to the canvas's color space metadata.
- PNG encode. The canvas is re-encoded as PNG via
canvas.toBlob('image/png'), which produces a lossless PNG with the original pixel data and (in modern browsers) the embedded ICC profile. - Download. The resulting Blob is wrapped into a download link. The file never leaves your machine.
A simplified version of the JavaScript looks like this:
javascriptimport { HeifDecoder } from 'libheif-js';

async function heicToPng(file) {
  const buffer = await file.arrayBuffer();
  const decoder = new HeifDecoder();
  const images = decoder.decode(buffer);

  // HEIC can contain multiple images (Live Photo, burst).
  // Take the primary image (the first item).
  const image = images[0];
  const { width, height, data } = image;

  // RGBA pixel data -> Canvas
  const canvas = new OffscreenCanvas(width, height);
  const ctx = canvas.getContext('2d');
  const imageData = new ImageData(new Uint8ClampedArray(data), width, height);
  ctx.putImageData(imageData, 0, 0);

  // Encode as PNG (lossless, preserves alpha and ICC)
  const blob = await canvas.convertToBlob({ type: 'image/png' });
  return blob;
}
Performance: on a modern laptop (M-series Mac or recent Intel), a 12 MP HEIC decodes in about 200–400 ms. Encoding to PNG takes another 100–200 ms. Total per-image time: under a second. On mobile (iPhone 14+), similar speeds are achievable in Safari.
The privacy win is significant. Every "free HEIC converter" website that processes your file on a server is also storing your photos on that server — and many of them are explicit about this in their terms of service. Browser-based WASM conversion is the only way to be certain your photos never leave your device.
The iPhone "Most Compatible" workaround
If you're reading this article because you're tired of converting HEIC, there's a setting that bypasses the problem entirely:
- Open Settings → Camera → Formats
- Switch from "High Efficiency" to "Most Compatible"
After this, the iPhone shoots JPEG (and H.264 video) instead of HEIC (and HEVC). Every new photo is instantly openable in every design tool, every browser, every email client.
The trade-off is exactly what you'd expect: you lose the 50% storage savings. A 1.5 MB HEIC becomes a 3 MB JPEG. On a 128 GB iPhone, that's the difference between storing roughly 60,000 photos and 30,000 photos. For casual users with cloud backup and modern storage tiers, the difference is unnoticeable. For pros who shoot RAW plus HEIC and care about every gigabyte, it's a real cost.
A middle path: keep shooting HEIC, and convert only the photos you're going to edit. The SynoxTools converter makes this trivial — drag in a handful of HEIC files, get back PNGs ready for design work. The bulk of your Camera Roll stays as HEIC for storage efficiency; only the select images you actually need as design assets get converted.
Batch converting a whole Camera Roll
If you're migrating a project — say, a wedding shoot, a product shoot, or a travel story — and you have 200 HEIC files that all need to become PNG, you don't want to convert them one at a time. The Batch Convert tool handles this: drop in 200 .heic files, pick PNG as the output, and the converter processes each one in your browser, then bundles the results into a single ZIP.
Things to know about batch HEIC to PNG:
- Time. Each 12 MP image takes about 0.5–1 second. 200 images is 2–4 minutes. The browser stays responsive because each image is processed in a Web Worker.
- Disk space. 200 HEIC files at 2 MB each is 400 MB in. 200 PNG files at 8 MB each is 1.6 GB out. Make sure you have room before unzipping.
- Memory. Each decoded image is held in memory only for the duration of that image's conversion. A modern machine can handle this comfortably; an older phone may struggle above 50 images at once.
- Live Photos. Each Live Photo HEIC produces one PNG (the cover frame). The motion portion is discarded.
For really large libraries (10,000+ photos), batch-converting everything to PNG is almost certainly wrong — you'll generate 80+ GB of PNGs you don't need. Convert selectively.
Step-by-step: how to convert HEIC to PNG
For a single image or a small batch:
- Open the converter. Go to the SynoxTools converter.
- Drop your file(s). Drag one or more .heic files onto the drop zone, or click to browse.
- Pick PNG as the output format. (The default may be JPG; switch it.)
- Convert. Click the convert button. Each image takes under a second on a modern machine.
- Download. For a single file, the PNG downloads directly. For multiple files, you get a ZIP.
- Verify color. Open one of the PNGs in Photoshop or Affinity and check the document color profile reads "Display P3" (or "Embedded"). If it reads "sRGB" and the reds look muted, your converter stripped the profile — try a different one.
For verification from the command line:
bash# Confirm ICC profile is embedded
exiftool -icc_profile:all photo.png

# Confirm dimensions match the HEIC source
exiftool -ImageWidth -ImageHeight photo.heic photo.png
Common mistakes
- Converting every HEIC to PNG "for quality." If you're not going to edit the image, JPG is the better target — it's 5× smaller and visually identical at quality 92. Reserve PNG for images that will go into a design workflow.
- Expecting PNG to fix HEIC artifacts. HEIC is already lossy. A PNG copy of a HEIC preserves whatever the HEIC decoder produced, artifacts and all. You're not "un-compressing" anything.
- Forgetting about Live Photos. If you convert a Live Photo HEIC to PNG, the motion portion is gone. Keep the original if you ever want the Live Photo effect back.
- Ignoring ICC profiles. A Display P3 photo converted to an sRGB-only PNG looks duller than the original. Check the profile.
- Re-converting through JPG as an intermediate. HEIC → JPG → PNG produces a PNG with JPG artifacts baked in. Always go HEIC → PNG directly.
- Shipping the PNG. The 8 MB PNG is a working file, not a delivery file. When you publish, export to JPG or WebP at the appropriate quality.
A note on the future
HEIC support is improving. Figma added it in 2023; Chrome's native HEIC support landed in 108 (late 2022); Windows 11 includes the codec on most SKUs. By 2027–2028, "convert HEIC to PNG" may be as quaint as "convert RAW to TIFF" is today — a workflow step that only matters to professionals.
Until then, the conversion is a fact of life for anyone working with iPhone photos in a design pipeline. The good news: it's fast, it's private when done in a browser-based tool, and going straight to PNG gives you a lossless, transparent, color-accurate working file that survives every edit, every re-save, and every design tool you'll throw at it.